
Any schmo can go out and buy a camera right? It seems that every time we go out and get ourselves a fancy new GoPro or a new Canon Lens, they release an even better version 12 hours later. Every wish for something simpler? Something Jack White probably uses because we bet he doesn’t even have electricity? Well we here at Whalebone like to go off grid every now and then, and that includes not needing to charge up our fancy (and now irrelevant) point and shoot.
We’ve decided to highlight how awesome photography used to be, in an age when photographers could fix their own cameras without needing a factory warranty. Hell they could even build their own camera if need be. Here’s how to make your own pinhole camera out of what’s lying around the house. Finding the film is the only hard part.
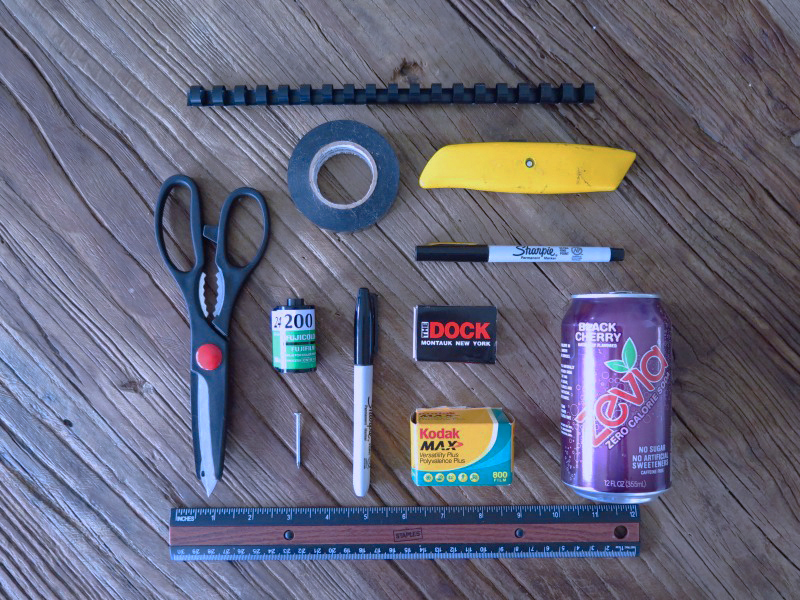
What You Need:
- A matchbox
- A new roll of 35mm film (100-200 speed is ideal)
- An empty roll of 35mm film
- Some thin cardboard (the box the new film comes in is fine)
- Beer Can
- Black electric tape
- The plastic from a spiral binder
- A fine nail or sewing pin
- Scissors
- Exacto Knife (or scalpel if you’re really cool)
- Black Sharpie
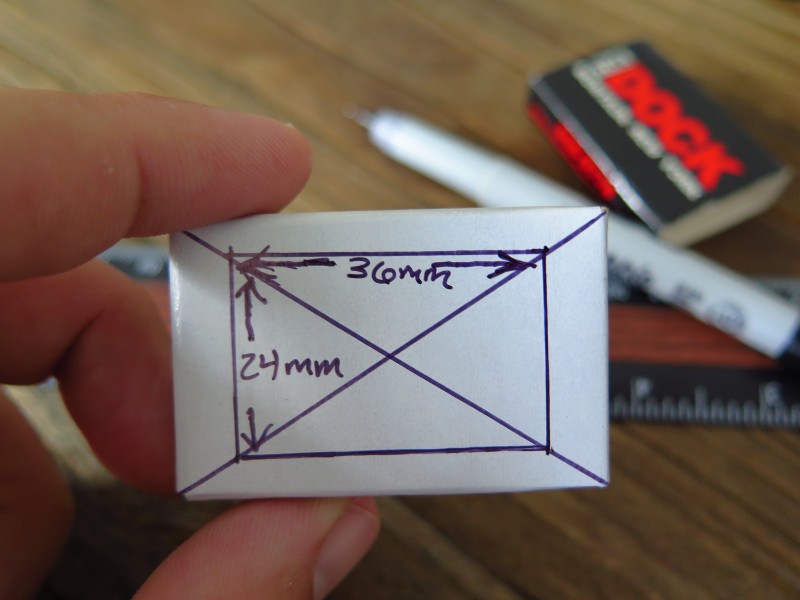
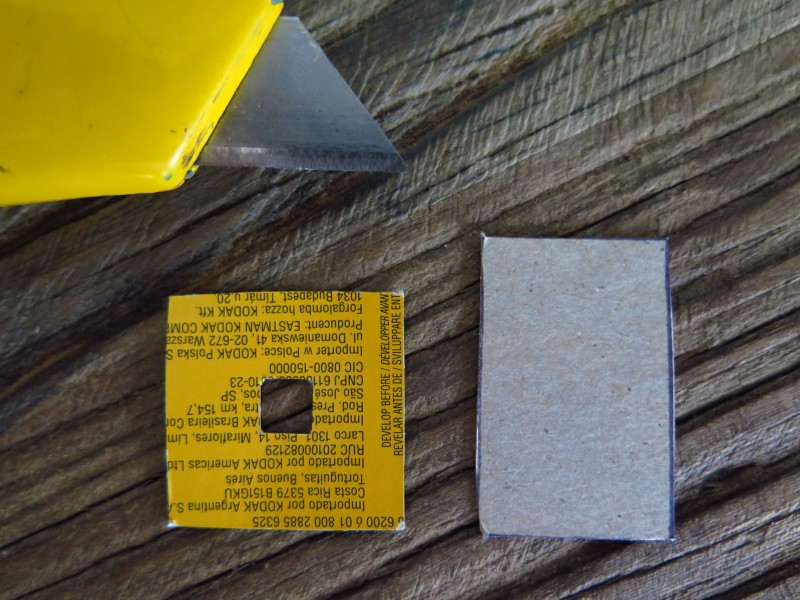
Step 1: Remove the match tray and mark out a 36mm x 24mm rectangle exactly in the centre of the match tray.
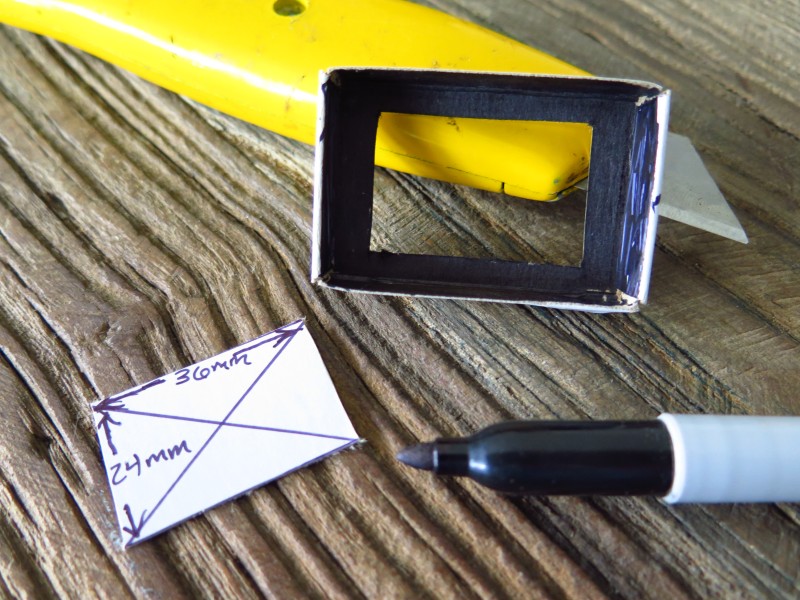
Step 2: Cut out the rectangle with your knife of choice, keeping the edges as neat as possible. Any rough edges and card fibers will appear around the edges of your photos which can also look cool. To reduce glare on the film, blacken the inside of the matchbook with the black marker (feel free to do the same with the inside of the matchbox cover if you’re feeling ambitious).
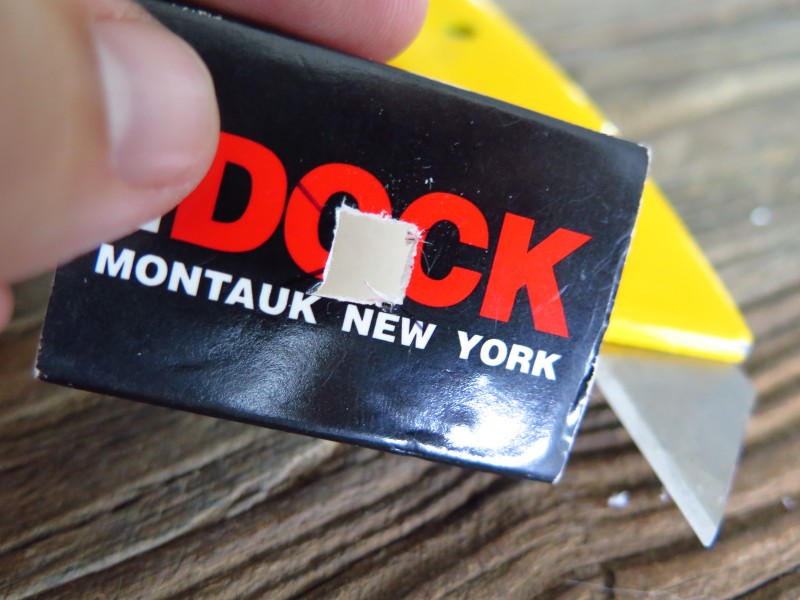
Step 3: At the exact center of the front of the matchbox sleeve, mark out a 6mm square and cut out (hopefully more carefully than I did).
Step 4: Cut about a 15mm square out of out of the aluminum can. Then using your needle (I used a small nail), gently press into the centre of the aluminum. Twisting between your fingers so that it slowly “drills” a hole through the metal, but not all the way through. The idea is to produce a very small hole with clean edges.
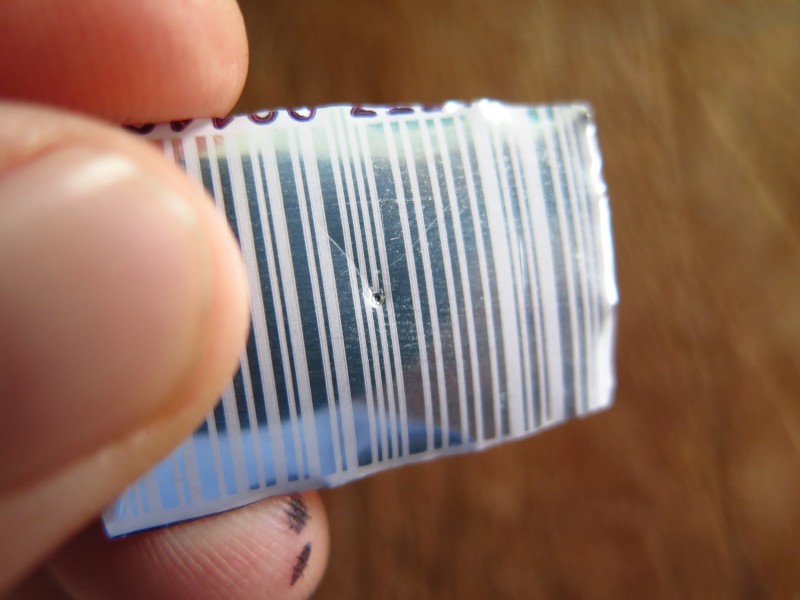
Step 5: Color the back of the aluminum again with your marker. Reflections are a bummer. Then place the aluminum on the matchbox, lining the pinhole up directly in the center of the square on top of the box and secure with the electrical tape.
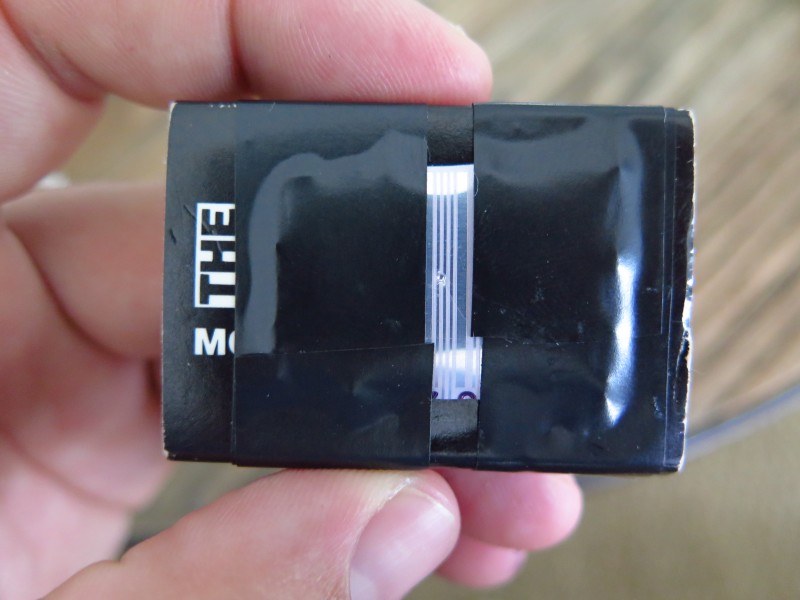
Step 6: Now make your shutter by cutting out two pieces of the box your film came in, a square about 30mm, and a rectangle about 20mm x 40mm. In the square piece, cut out a 6mm hole again.
Step 7: Tape the square with the square over the pinhole, taping down on 3 sides and leaving the top open for the rectangular piece to slip in, fully covering the pinhole. That’s what she said.
Step 8: Now with a piece of the spiral binder, wrap it around your roll of film, inserting the corner of the spiral into the sprocket of the film, and tape down firmly. This gives you the click to know you’ve exposed another frame of film as you move it through the camera.

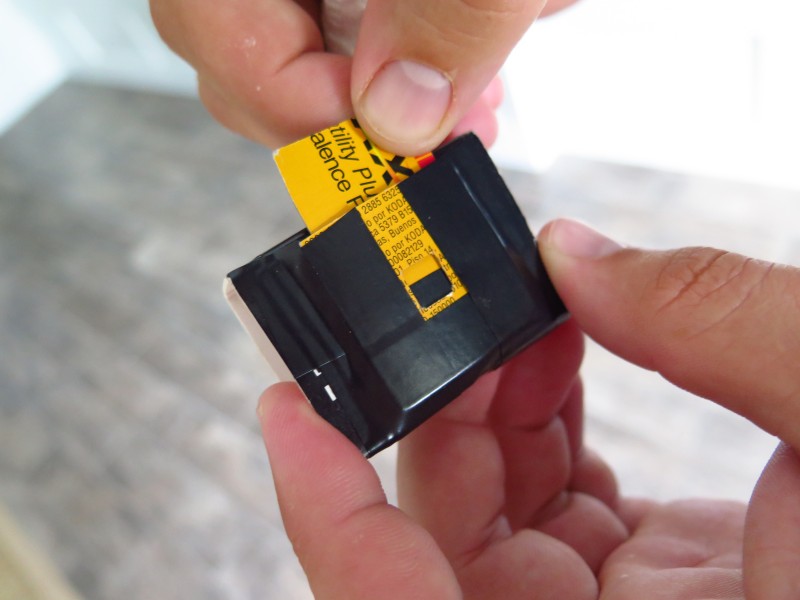
Step 9: Ready for a beer yet? Have one. Now cut the film in a straight line in between sprockets, and slide it (matte emulsion side facing the pinhole) through the matchbox, inserting the tray along with it to secure the film.

Step 10: Now for all you film school dropouts, splice one end of the film together with the bit you left on the end of your take up film spool, then wind it up inside the canister until both film rolls are flush against the side of the matchbox, and tape aggressively to prevent light leaks.

Step 11: To hold tension and to prevent the take up film from spooling, stick a bit of toilet paper in one end, covering with tape when tightened. With the pinhole covered, you should be able to wind the film through rotating the take-up spool counterclockwise, hearing a click as you advance through each frame.

Now get out there and take some pictures you can’t immediately share but look pretty darn cool. You’re on your own trying to get them developed though.